Automating Chrome History Collection using CrowdStrike and Tracecat - Part 2: The Collection Engine
Introduction
In Part 1, we established the foundation: device validation, RTR session initialization, user discovery, and Chrome installation detection. Now we’ll be working on the evidence collection while maintaining forensic integrity.
This is where we can really appreciate the power of SOAR, especially in incident response scenarios. Manual collection of Chrome history files across multiple profiles is time-consuming and can be prone to errors if the steps are not done correctly. This workflow not only makes this process more efficient but also less risky as we conduct validation at every step to ensure that maintain integrity in the evidence chain.
Part 2 covers three critical phases: integrity verification before we touch anything, the actual collection that copies files safely, and packaging everything for upload. We want to ensure that we that appropriately preserve evidence to prevent any form of contamination.
Understanding for_each Loops in Tracecat
Before we dive into the collection actions, we need to cover for_each loops in Tracecat, as they’re the mechanism that makes multi-profile collection possible.
What is for_each?
A for_each loop in Tracecat allows a single action to execute multiple times, once for each item in a list. Instead of manually creating separate actions for “copy Profile 1”, “copy Profile 2”, “copy Profile 3”, you create one action that loops through all profiles automatically.
The Syntax:
for_each:
  - ${{ for var.item in ACTIONS.previous_action.result.items }}
This creates a loop where:
var.itemis the loop variable (you can name it anything:var.profile,var.file,var.cmd)- Each iteration gets one item from the list
- Inside the action, you reference the current item using
${{ var.item.property }}
Why Use for_each?
In our Chrome history collection, we don’t know how many profiles exist until runtime. A user might have:
- 1 profile (just “Default”)
- 3 profiles (“Default”, “Profile 1”, “Work”)
- 10 profiles (power users with separate profiles for different projects)
With for_each, one action handles all cases. The workflow discovers profiles dynamically, then loops through whatever it found.
How Results Work:
When an action uses for_each, its result becomes a list—one entry per iteration. So if you hash 3 profiles, ACTIONS.generate_file_hashes.result returns a list with 3 hash results. Subsequent actions can process that entire list.
Example from This Workflow:
for_each:
  - ${{ for var.history_file in ACTIONS.parse_all_chrome_history_files_found.result.history_files }}
This loops through the history_files list from our discovery phase. If we found 3 profiles, the action runs 3 times. Each iteration has access to var.history_file.history_path and var.history_file.profile_name for that specific profile.
You’ll see for_each used twice in this part: once for hashing original files, and once for copying them. Watch how the loop variable changes meaning in each context.
The Workflow Architecture
| Phase | Actions | Status |
|---|---|---|
| Phase 1: Foundation | Create case → Find device → Validate macOS → Init RTR → Discover users → Find Chrome | ✅ Link to post |
| Phase 2: Collection | Hash files → Copy to /tmp → Validate → Zip → Hash zip → Upload | ✅ Covered in this post |
| Phase 3: Cleanup | Remove temp files → Verify cleanup → Close RTR → Final audit | 🔜 Coming soon |
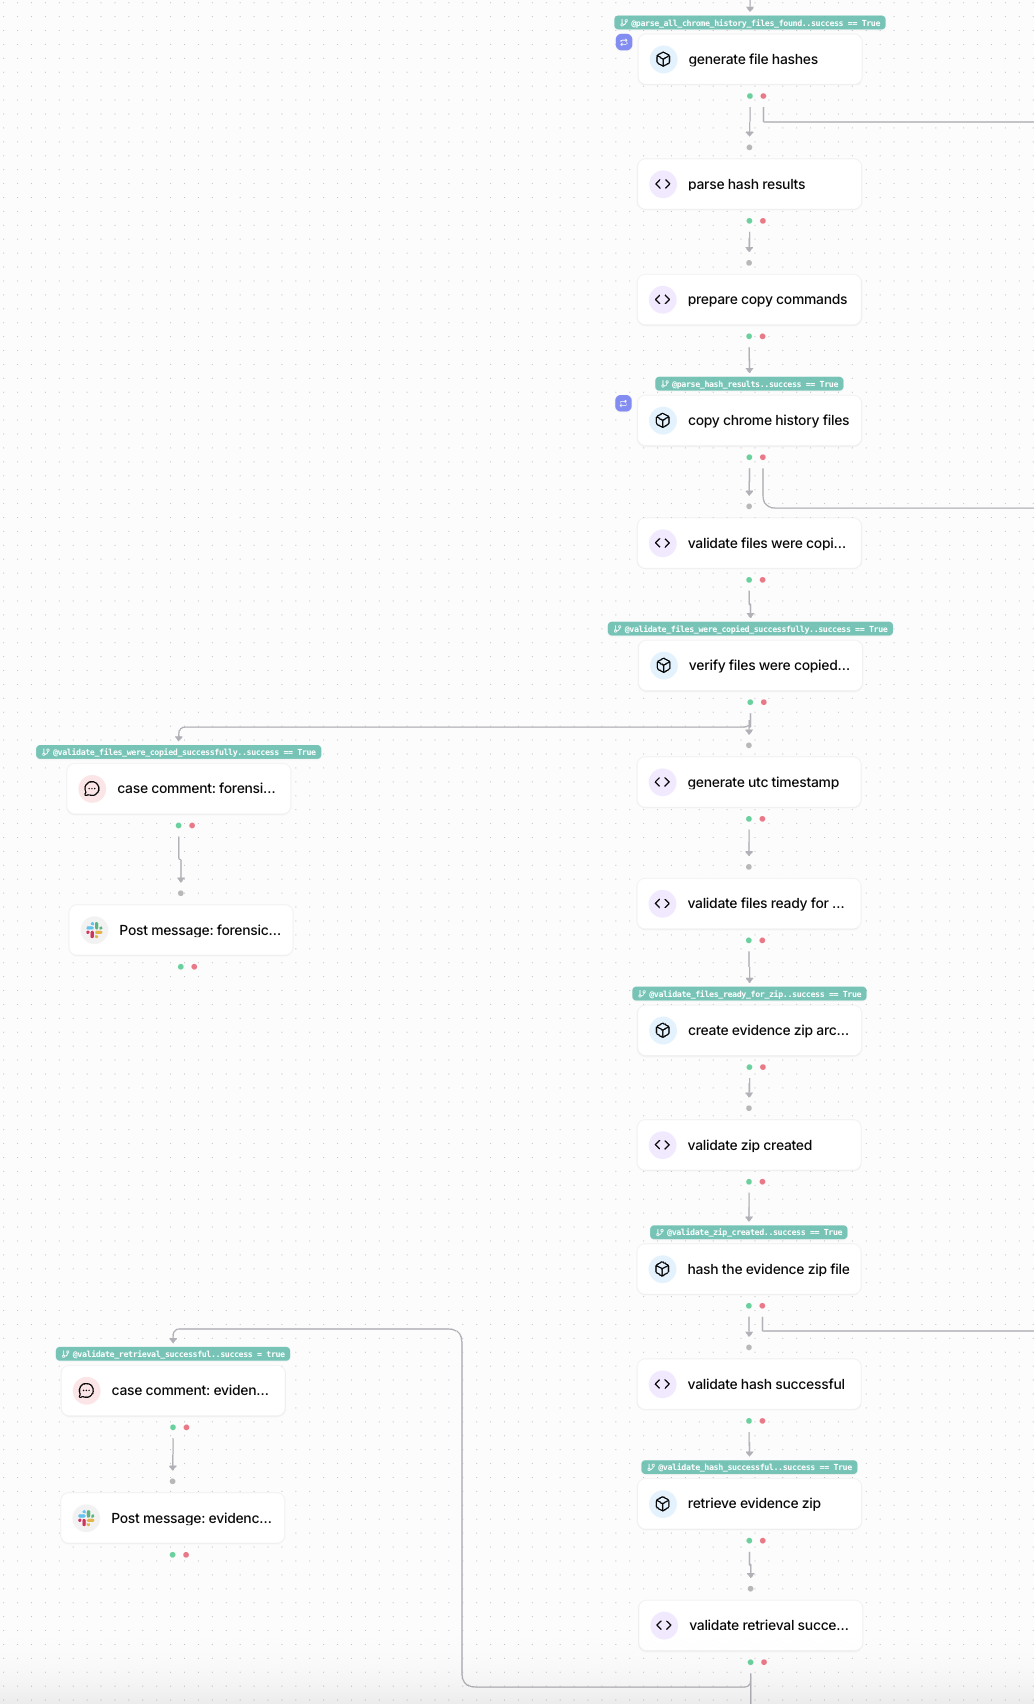
Section 1: Evidence Integrity Pre-Collection
Before we copy a single file, we need baseline integrity hashes. This establishes proof that the files we’re about to collect match the files we eventually analyze. Recording these original hashes begins the chain of custody documentation.
Action 1: Computing Original File Hashes - generate_file_hashes
What it does:
Iterates through every Chrome history file discovered in Part 1, it then generates MD5, SHA1, and SHA256 hashes using CrowdStrike’s RTR filehash command. This runs as a for_each loop, creating one hash operation per profile.
Why it matters:
These hashes prove the files existed in this exact state before your workflow touched them. They let you detect if files were modified between hashing and copying, which acts as a critical integrity check.
The for_each loop here is important because each profile needs independent hash generation. If one profile’s hash fails, the others continue successfully. This prevents a single corrupted file from blocking your entire collection.
The for_each loop uses var.history_file to reference each file’s path from the discovery phase. The command string includes quotes around the path to handle spaces in profile names like “Profile 1” or “System Profile”.
How to add it:
- Create a new action with type
tools.falcon.call_commandand add the below config. - Set dependency on
parse_all_chrome_history_files_found
operation_id: BatchAdminCmd
params:
  body:
    base_command: filehash
    command_string: filehash "${{ var.history_file.history_path }}"
    batch_id: ${{ ACTIONS.extract_session_information.result.batch_id }}
    session_id: ${{ ACTIONS.extract_session_information.result.session_id }}
- Add
run ifcondition:
${{ ACTIONS.parse_all_chrome_history_files_found.result.success == True }}
- Add
for loop:
${{ for var.history_file in ACTIONS.parse_all_chrome_history_files_found.result.history_files }}
What you’ll see: If the action is successful, you will the individual MD5, SHA1 and SHA256 hash values for each history file in the stdout field.
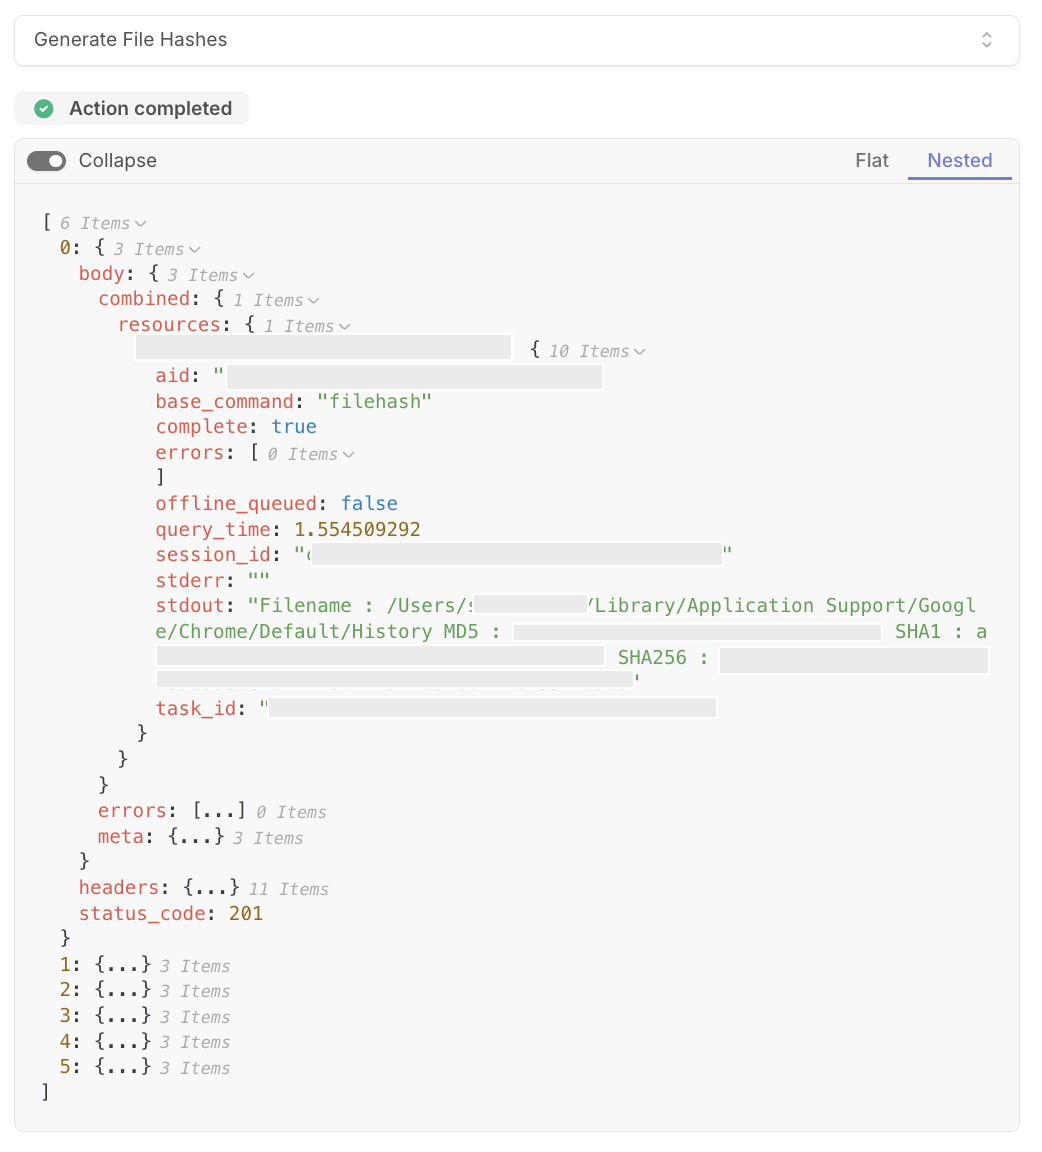
Action 2: Extracting Hash Values - parse_hash_results
What it does:
Parses the RTR response from generate_file_hashes to extract the actual MD5, SHA1, and SHA256 hash values using regex patterns. Returns a structured list of hash information for each file with the filename, all three hash types, and metadata.
Why it matters:
RTR returns hash output as formatted text, not structured data. The parsing provides a programmatic way to reference the hashes later in a human-readable output. What we’re doing with the python script is transforming text into data structures you can use for validation.
The regex extraction looks for specific hash patterns (32 hex chars for MD5, 40 for SHA1, 64 for SHA256) rather than assuming position.
This script handles multiple hash responses (one per profile) and extracts each hash type separately.
- The
file_indexfield helps you correlate hashes back to specific profiles later. - The
source_type: "original_file"tag distinguishes these from post-copy hashes you might generate later for additional verification.
How to add it:
- Create a new action with type
core.script.run_pythonand add the below config. - Set dependency on
generate_file_hashes
inputs:
  hash_responses: ${{ ACTIONS.generate_file_hashes.result }}
script: |
  import re

  def main(hash_responses):
      # Initialize list to store parsed hash information
      original_hashes = []

      # Process each hash response from the for_each loop
      # enumerate gives us both the index (i) and the response object
      for i, response in enumerate(hash_responses):
          # Navigate through RTR's nested response structure
          combined = response.get("body", {}).get("combined", {})
          resources = combined.get("resources", {})

          if resources:
              # Get the device ID dynamically (first key in resources dict)
              device_id = list(resources.keys())[0]
              device_result = resources[device_id]

              # Only process if the hash command completed successfully
              if device_result.get("complete"):
                  # stdout contains the formatted hash output from RTR
                  stdout = device_result.get("stdout", "")

                  # Use regex to extract hash values - more reliable than string splitting
                  # \s* matches any whitespace, \s+? matches minimal whitespace
                  filename_match = re.search(r'Filename\s*:\s*([^\n]+?)\s+MD5', stdout)
                  md5_match = re.search(r'MD5\s*:\s*([a-fA-F0-9]{32})', stdout)
                  sha1_match = re.search(r'SHA1\s*:\s*([a-fA-F0-9]{40})', stdout)
                  sha256_match = re.search(r'SHA256\s*:\s*([a-fA-F0-9]{64})', stdout)

                  # Extract matched groups, defaulting to empty string if no match
                  filename = filename_match.group(1).strip() if filename_match else ""
                  md5_hash = md5_match.group(1) if md5_match else ""
                  sha1_hash = sha1_match.group(1) if sha1_match else ""
                  sha256_hash = sha256_match.group(1) if sha256_match else ""

                  # Build structured hash information object
                  hash_info = {
                      "file_index": i + 1,  # Human-readable numbering (1-based)
                      "source_type": "original_file",  # Tag for distinguishing from post-copy hashes
                      "filename": filename,
                      "hash_details": [  # Human-readable list for case comments
                          f"Filename: {filename}",
                          f"MD5: {md5_hash}",
                          f"SHA1: {sha1_hash}",
                          f"SHA256: {sha256_hash}"
                      ],
                      # Individual hash fields for programmatic comparison
                      "md5": md5_hash,
                      "sha1": sha1_hash,
                      "sha256": sha256_hash
                  }

                  original_hashes.append(hash_info)

      # Return structured result with success flag and total count
      return {
          "success": True,
          "original_file_hashes": original_hashes,
          "total_original_hashes": len(original_hashes)
      }
What you’ll see: If the action is successful, you will the results from the previous action organised into individual fields.
![[parse hash results]](/images/posts/macos-chrome-forensics-part2/2%20parse%20harsh%20results.png)
Section 2: The Collection Engine
Now that we have hashes, we can safely copy the chrome history files. This section focuses on the actual collection loop with multiple validation checkpoints to ensure every file copied successfully.
Action 3: Building Copy Commands - prepare_copy_commands
What it does:
Generates individual RTR copy commands for each Chrome history file discovered. Takes the source paths from Chrome profile directories and creates corresponding target paths in /tmp/, handling spaces in profile names by converting them to underscores.
Why it matters:
RTR’s cp command is sensitive to quoting and path formatting. Building commands dynamically ensures proper escaping for edge cases like “Profile 1” or profiles with special characters. This action also centralizes path logic so if you need to change the target directory later, you modify it once here.
The output creates a structured list of copy commands with both source and target paths clearly defined. This makes validation easier in later steps because you know exactly what should exist in /tmp/ when copying completes.
The script stores both the command string and the individual paths. You’ll use command_string for the actual RTR copy, but you’ll reference target_path later for cleanup and verification. The profile_number helps with debugging if a specific profile fails, you can immediately identify which one.
How to add it:
- Create a new action with type
core.script.run_pythonand add the below config. - Set dependency on
parse_hash_results
script: |
  def main(history_files):
           # Fail fast if no history files were discovered
           if not history_files or len(history_files) == 0:
               return {
                   "success": False,
                   "error": "No history files to copy"
               }

           # Build list of copy command objects
           copy_commands = []

           # Process each discovered history file
           # enumerate with start=1 gives us human-friendly numbering
           for i, file_info in enumerate(history_files, 1):
               history_path = file_info.get("history_path")
               profile_name = file_info.get("profile_name", f"Profile_{i}")

               # Replace spaces with underscores for filesystem safety
               # "Profile 1" becomes "Profile_1_History"
               safe_profile_name = profile_name.replace(" ", "_")

               # Build target path in /tmp directory
               target_path = f"/tmp/{safe_profile_name}_History"

               # Create copy command object with all relevant information
               copy_commands.append({
                   # Pre-quoted command string for RTR
                   "command_string": f'"{history_path}" "{target_path}"',
                   "profile_number": i,  # For debugging specific profiles
                   "profile_name": safe_profile_name,
                   "source_path": history_path,  # For validation
                   "target_path": target_path  # For cleanup later
               })

           return {
               "success": True,
               "copy_commands": copy_commands,
               "total_files": len(copy_commands)
           }
inputs:
  history_files: ${{ ACTIONS.parse_all_chrome_history_files_found.result.history_files }}
What you’ll see: If the action is successful, you will the values populated for the various fields we’ll use later on in this workflow.
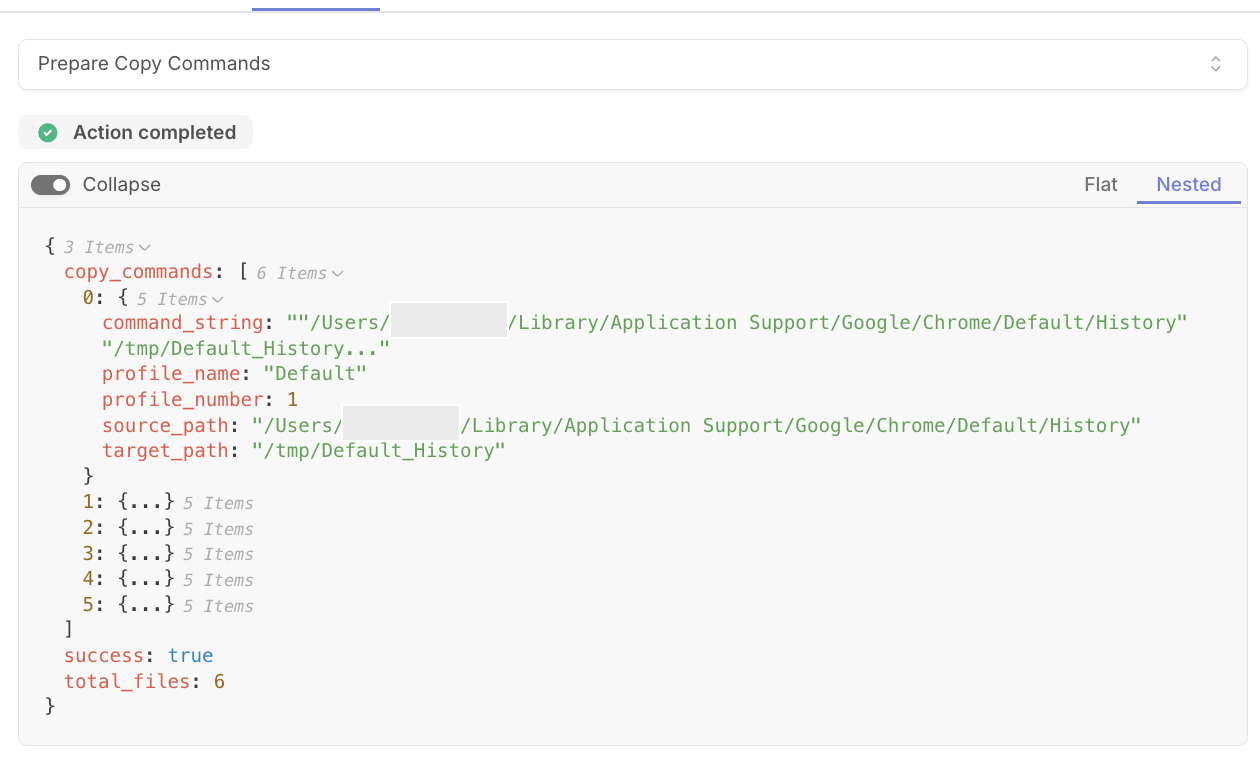
Action 4: The Copy Loop - copy_chrome_history_files
What it does:
Executes the copy commands generated in the previous step as a for_each loop. Each iteration copies one Chrome history file from its original location to /tmp/ using RTR’s cp command with elevated privileges (BatchAdminCmd).
Why it matters:
This is the moment where your workflow actually touches evidence. Using for_each provides granular control, if one file copy fails (corrupted file, permission issue, disk space), the other copies continue.
The run_if condition ensures you only attempt copies if hash generation succeeded, if there are no hashes then there are no files to copy. The for_each loop iterates through copy_commands, using var.cmd.command_string to access each pre-built command.
How to add it:
- Create a new action with type
tools.falcon.call_commandand add the below config. - Set dependency on
prepare_copy_commands
operation_id: BatchAdminCmd
params:
  body:
    base_command: cp
    command_string: cp ${{ var.cmd.command_string }}
    batch_id: ${{ ACTIONS.extract_session_information.result.batch_id }}
    session_id: ${{ ACTIONS.extract_session_information.result.session_id }}
- Add
run ifcondition:
${{ ACTIONS.parse_hash_results.result.success == True }}
- Add
for loop:
${{ ${{ for var.cmd in ACTIONS.prepare_copy_commands.result.copy_commands }}
What you’ll see: If the action is successful, you will a true value in the complete field.
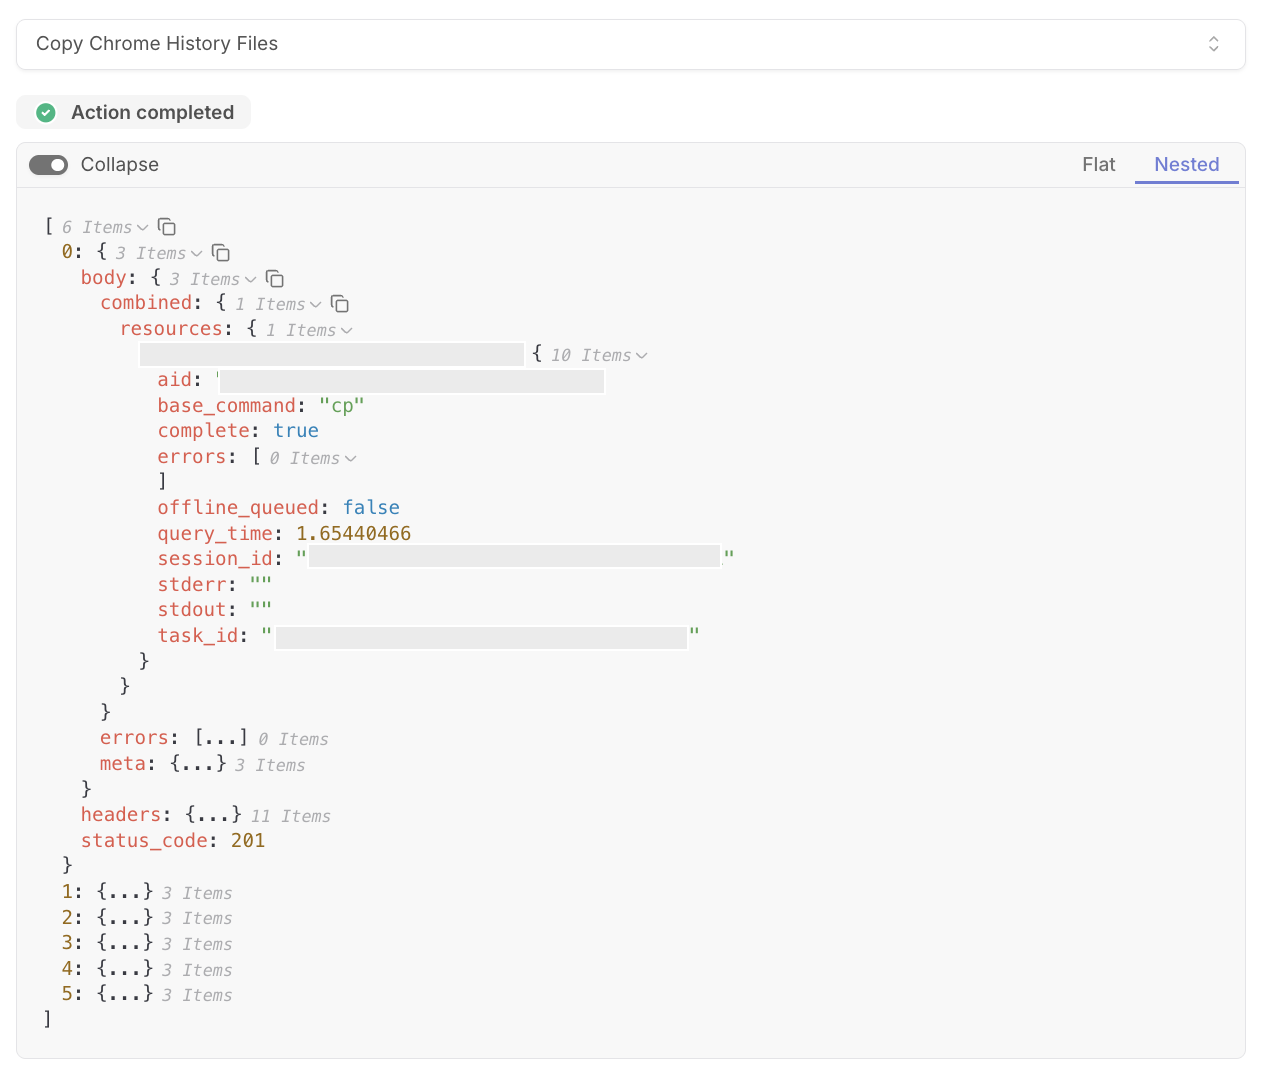
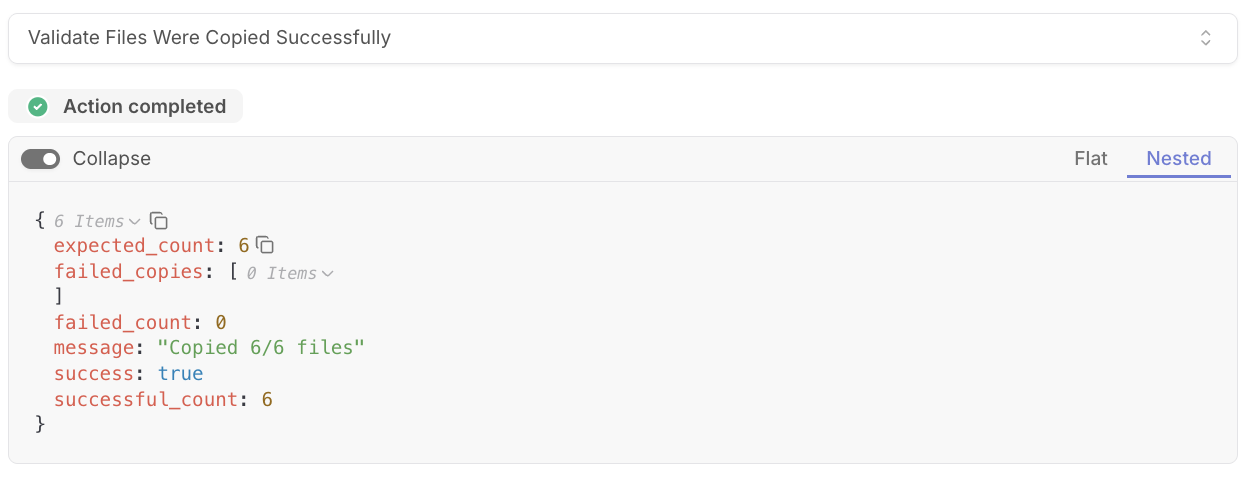
Action 5: Validation Pattern - validate_files_were_copied_successfully
What it does:
Analyzes the results from the copy loop to verify that each file was copied successfully. It also checks each RTR response for completion status, error messages, and stderr output. The response returns detailed success/failure counts and identifies which specific copies failed.
Why it matters:
RTR doesn’t fail loudly. A copy command might return successfully even if the file wasn’t copied. This validation catches those silent failures by examining the actual response data, not just exit codes. This validation helps prevent collecting incomplete evidence by providing detailed tracking to let you if what failures occured.
This script implements validation by checking the complete flag, it looks for error arrays, and scans stderr for common failure strings. The comparison against expected_count catches cases where RTR returns success but fewer files than expected actually copied.
How to add it:
- Create a new action with type
core.script.run_pythonand add the below config. - Set dependency on
copy_chrome_history_files
script: |
  def main(copy_results, device_id, expected_count):
         # Initialize tracking variables
         all_successful = True
         failed_copies = []
         successful_count = 0

         # Iterate through each copy result from the for_each loop
         for i, result in enumerate(copy_results):
             # Navigate RTR's response structure
             resources = result.get("body", {}).get("combined", {}).get("resources", {})
             if device_id in resources:
                 device_result = resources[device_id]

                 # Extract all error indicators
                 errors = device_result.get("errors", [])
                 complete = device_result.get("complete", False)
                 stderr = device_result.get("stderr", "")
                 stdout = device_result.get("stdout", "")

                 # Check for multiple failure conditions
                 # Not just "did it error?" but "are there signs of failure?"
                 has_error = (
                     not complete or  # Command didn't finish
                     len(errors) > 0 or  # RTR reported errors
                     "no such file" in stderr.lower() or  # File not found
                     "not found" in stderr.lower() or  # Another not found variant
                     "none" in stderr.lower()  # Empty result indicator
                 )

                 if has_error:
                     all_successful = False
                     # Store detailed failure information for debugging
                     failed_copies.append({
                         "index": i + 1,  # Which profile failed (1-based)
                         "errors": errors,
                         "stderr": stderr,
                         "complete": complete
                     })
                 else:
                     successful_count += 1

         # Final check: did we copy everything we expected?
         # Even if no individual failures, missing files means failure
         if successful_count < expected_count:
             all_successful = False

         return {
             "success": all_successful,
             "successful_count": successful_count,
             "expected_count": expected_count,
             "failed_count": len(failed_copies),
             "failed_copies": failed_copies,  # Detailed failure info
             "message": f"Copied {successful_count}/{expected_count} files"
         }
inputs:
  copy_results: ${{ ACTIONS.copy_chrome_history_files.result }}
  device_id: ${{ ACTIONS.extract_session_information.result.device_id }}
  expected_count: ${{ ACTIONS.parse_all_chrome_history_files_found.result.history_file_count }}
What you’ll see: If the action is successful, you will the true value in the success field and a confirmation of how many files were copied.
Action 6: Secondary Check - verify_files_were_copied_succesfully
What it does:
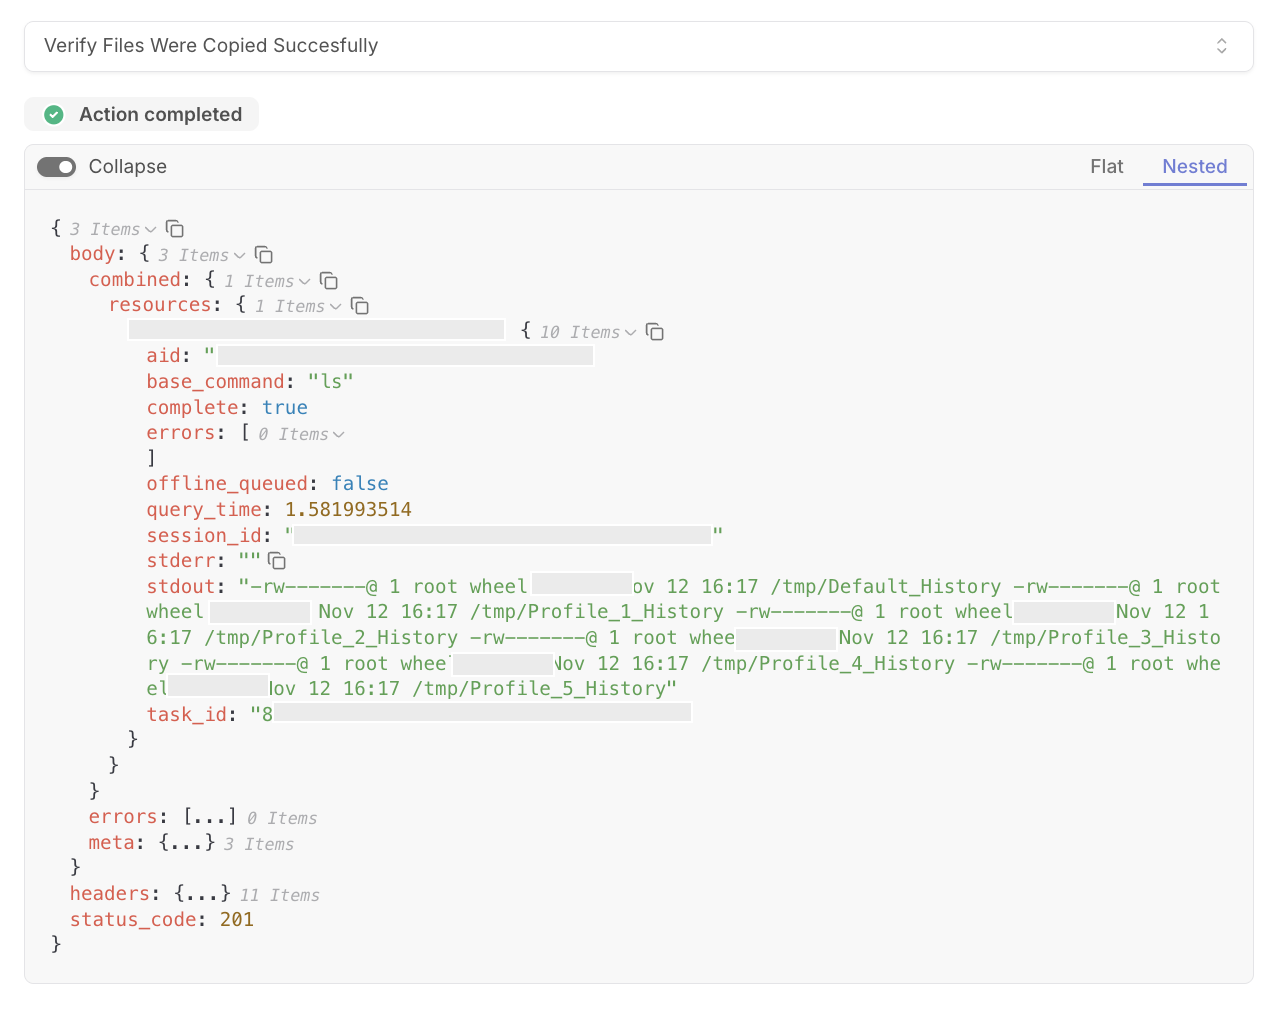
Performs a secondary verification by listing the contents of /tmp/*_History to confirm the copied files actually exist on the filesystem. This is an independent check that doesn’t rely on the copy command’s reported success.
Why it matters:
Trust but verify. The previous action checked what RTR reported. This action checks what actually exists. An ls -l command provides confirmation and file sizes as additional validation.
This is also your visual confirmation point. The ls -l output shows file timestamps and sizes, which helps you spot anomalies. A 0-byte History file means something went wrong; a file with a recent timestamp confirms the copy happened just now, not hours ago.
The wildcard pattern /tmp/*_History matches all copied files regardless of profile name. The -l flag provides long-form output with timestamps and sizes. The run_if condition ensures you only verify if the first validation passed—no point listing files if you already know copies failed.
How to add it:
- Create a new action with type
tools.falcon.call_commandand add the below config - Set dependency on
validate_files_were_copied_successfully
operation_id: BatchAdminCmd
params:
  body:
    base_command: ls
    command_string: ls -l /tmp/*_History
    batch_id: ${{ ACTIONS.extract_session_information.result.batch_id }}
    session_id: ${{ ACTIONS.extract_session_information.result.session_id }}
- Add
run ifcondition:
${{ ACTIONS.validate_files_were_copied_successfully.result.success == True }}
What you’ll see: If the action is successful, the stdout field will return the chrome history files listed in the /tmp directory
Action 7: Documentation - case_comment_forensic_collection_started
What it does:
Creates a case management comment documenting that the evidence collection phase has started, original file hashes were generated, and Chrome history files are being copied to /tmp/ for packaging.
Why it matters:
The comment specifically mentions that original hashes exist, to help ensure that proper chain of custody procedures were followed. The dynamic reference to history_file_count documents exactly how many files you’re collecting.
How to add it:
- Create a new action with type
core.cases.create_comment - Set dependency on
verify_files_were_copied_succesfully
case_id: ${{ACTIONS.create_case.result.id}}
content: |-
  Evidence Collection Phase - Original file integrity hashes generated.
  Copying ${{ ACTIONS.parse_all_chrome_history_files_found.result.history_file_count }}
  Chrome history file(s) to /tmp for secure packaging and upload.
- Add
run ifcondition:
${{ ACTIONS.validate_files_were_copied_successfully.result.success == True }}
What you’ll see: If the action is successful, you will see a new comment added to the case.

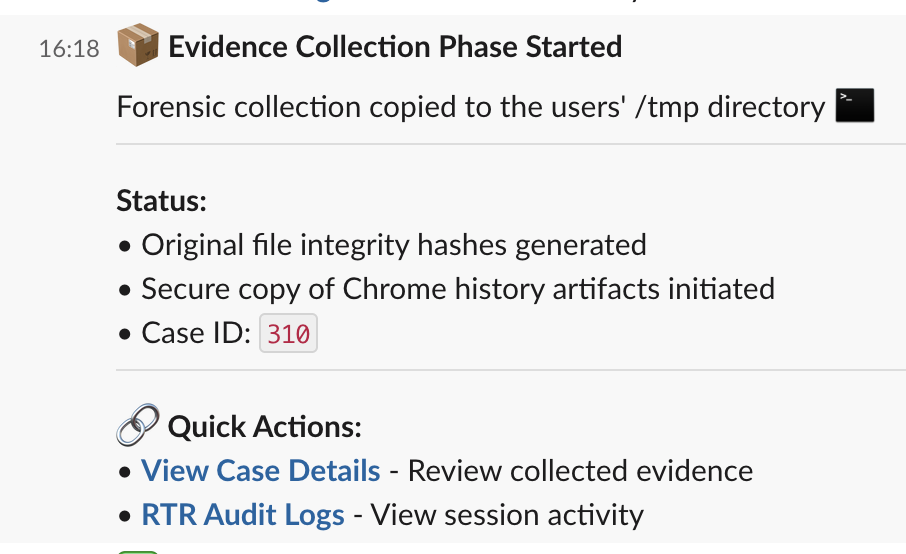
Action 8: Slack Update - post_message_forensic_collection_started
What it does:
Sends a Slack notification to your security team’s channel announcing that the evidence collection phase has started. Includes file counts, case ID, and links to both the case management system and RTR audit logs.
Why it matters:
Provides real-time notifications to your team to let them know that evidence collection has started.
How to add it:
- Create a new action with type
tools.slack.post_message - Set dependency on
case_comment_forensic_collection_started - Update channel with your Slack channel ID
- Customize the URLs to match your instances
- Configure the following fields:
channel: # Add  your channel ID
blocks:
  - type: section
    text:
      type: mrkdwn
      text: |-
        📦 *Evidence Collection Phase Started*

        Forensic collection copied to the users' /tmp directory :terminal:
  - type: divider
  - type: section
    text:
      type: mrkdwn
      text: |-
        *Status:*
        • Original file integrity hashes generated
        • Secure copy of Chrome history artifacts initiated
        • Case ID: `${{ACTIONS.create_case.result.case_number}}`
  - type: divider
  - type: section
    text:
      type: mrkdwn
      text: |-
        *🔗 Quick Actions:*
        • <https://tracecat.com/workspaces/[workspace-id]/cases|*View Case Details*> - Review collected evidence
        • <https://X.crowdstrike.com/real-time-response/sessions/audit-logs|*RTR Audit Logs*> - View session activity
What you’ll see: If the action is successful, you will see a slack message posted in the channel you’ve setup.
Section 3: Packaging for Transport
Now that the files have been copied and verified, we need to upload them to RTR cloud. Before we do this, we need to ensure we create a timestamped zip archive and generate final integrity hashes.
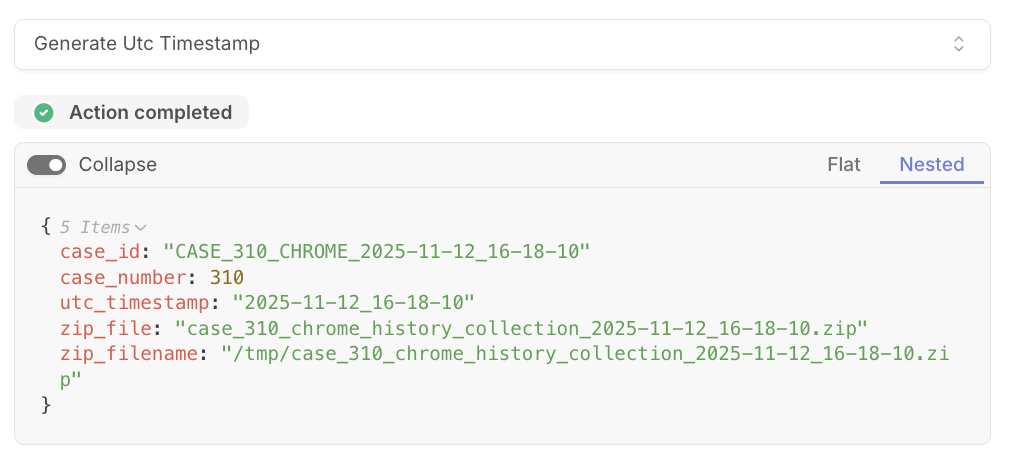
Action 9: Creating Evidence Filename - generate_utc_timestamp
What it does:
Generates a UTC timestamp in YYYY-MM-DD_HH-MM-SS format and constructs the evidence archive filename: case_[number]_chrome_history_collection_[timestamp].zip. Returns both the full path for RTR commands and just the filename for reference.
Why it matters:
Timestamps in evidence filenames are forensic best practice. They prevent filename collisions and establish when the collection occurred. Using UTC avoids timezone ambiguity, your evidence filename has the same timestamp whether viewed in London or Singapore.
The case number prefix creates a clear association between the zip file and the case management record. If you’re investigating case CASE-2024-1337, your evidence file is case_CASE-2024-1337_chrome_history_collection_2024-01-15_14-23-47.zip.
The script returns multiple formats of the filename because different actions need different versions. RTR commands need the full path (/tmp/case_...), while case comments and Slack messages need just the filename. The case_id field creates a human-readable identifier for the entire collection operation.
How to add it:
- Create a new action with type
core.script.run_pythonand add the below config. - Set dependency on
verify_files_were_copied_succesfully
inputs:
  case_info: ${{ ACTIONS.create_case.result }}
script: |
  def main(case_info):
    from datetime import datetime, timezone

    # Generate UTC timestamp to avoid timezone ambiguity
    # YYYY-MM-DD_HH-MM-SS format is sortable and human-readable
    utc_now = datetime.now(timezone.utc)
    utc_timestamp = utc_now.strftime("%Y-%m-%d_%H-%M-%S")

    # Get case number for filename association
    case_number = case_info.get("case_number", "UNKNOWN")

    # Build evidence filename with case number and timestamp
    # This creates clear chain of custody documentation
    return {
        "utc_timestamp": utc_timestamp,
        "case_number": case_number,
        # Full path for RTR commands
        "zip_filename": f"/tmp/case_{case_number}_chrome_history_collection_{utc_timestamp}.zip",
        # Just filename for case comments and logging
        "zip_file": f"case_{case_number}_chrome_history_collection_{utc_timestamp}.zip",
        # Unique identifier for this collection operation
        "case_id": f"CASE_{case_number}_CHROME_{utc_timestamp}"
    }
What you’ll see: If the action is successful, you will a response with the case_id, utc timestamp, zip file and zip file name.
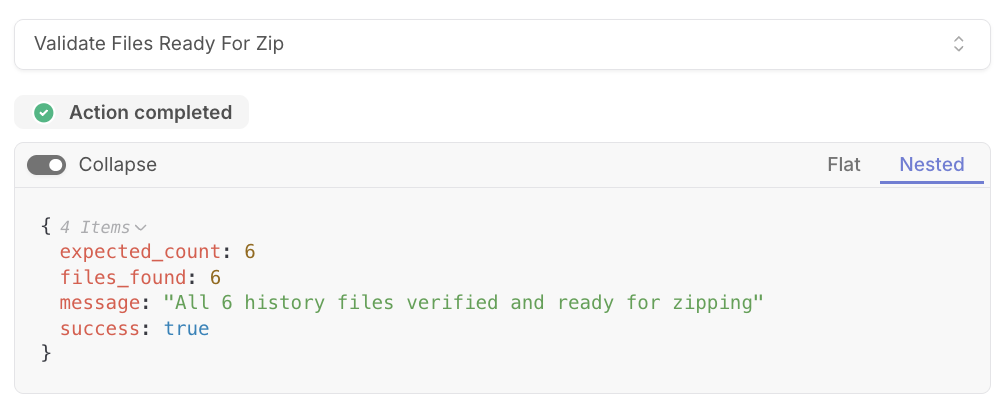
Action 10: Pre-Zip Validation - validate_files_ready_for_zip
What it does:
Parses the output from verify_files_were_copied_succesfully to count how many History files exist in /tmp/. Compares the count against the expected number of profiles. Fails if files are missing or if the listing command didn’t complete successfully.
Why it matters:
This is your last checkpoint before creating the archive. If you zip an incomplete collection, this creates forensically weak evidence as the archive exists but it’s missing data. This validation spots that problem.
The filesystem count provides independent confirmation of what’s actually there. Previous validations checked what RTR reported; this validation checks what ls found. If there’s a discrepancy, something went wrong in the copy process that earlier checks missed.
The script searches for lines containing _History because that’s the naming pattern from prepare_copy_commands. Counting matches is more reliable than counting total lines, which could include directory headers or empty lines depending on the shell environment.
How to add it:
- Create a new action with type
core.script.run_pythonand add the below config. - Set dependency on
generate_utc_timestamp
inputs:
  verification_result: ${{ ACTIONS.verify_files_were_copied_succesfully.result }}
  device_id: ${{ ACTIONS.extract_session_information.result.device_id }}
  expected_file_count: ${{ ACTIONS.parse_all_chrome_history_files_found.result.history_file_count }}
script: |
  def main(verification_result, device_id, expected_file_count):
        # Navigate RTR response structure
        resources = verification_result.get("body", {}).get("combined", {}).get("resources", {})

        if not resources or device_id not in resources:
            return {
                "success": False,
                "error": "No verification result found"
            }

        device_result = resources[device_id]
        stdout = device_result.get("stdout", "")
        stderr = device_result.get("stderr", "")

        # Verify the ls command completed
        if not device_result.get("complete", False):
            return {
                "success": False,
                "error": "Verification command did not complete"
            }

        # Check for RTR-reported errors
        errors = device_result.get("errors", [])
        if len(errors) > 0:
            return {
                "success": False,
                "error": f"Verification errors: {errors}"
            }

        # Empty stdout means no files found - copy failed
        if not stdout or stdout.strip() == "":
            return {
                "success": False,
                "error": "No files found in /tmp - copy operation failed"
            }

        # Count lines containing _History pattern
        # This matches our naming convention from prepare_copy_commands
        lines = stdout.strip().split('\n')
        history_files = [line for line in lines if '_History' in line]
        files_found = len(history_files)

        # Compare actual vs expected file counts
        # Fail if we're missing any files before zipping
        if files_found < expected_file_count:
            return {
                "success": False,
                "error": f"Expected {expected_file_count} files but only found {files_found}",
                "files_found": files_found
            }

        return {
            "success": True,
            "files_found": files_found,
            "expected_count": expected_file_count,
            "message": f"All {files_found} history files verified and ready for zipping"
        }
What you’ll see: If the action is successful, you will a true value in the success field returned along with the number of files that were zipped.
Action 11: Zipping Evidence - create_evidence_zip_archive
What it does:
Creates a compressed zip archive of all Chrome history files in /tmp/ using RTR’s zip command with the -r flag for recursive archiving. The archive filename comes from generate_utc_timestamp and includes the case number and timestamp.
Why it matters:
Zipping serves two purposes: compression reduces upload time and bandwidth, and the single-file format ensures all evidence stays together. Uploading 5 separate History files means 5 separate download operations during analysis, whereas uploading 1 zip means 1 download.
The archive also acts as a tamper-evident container. The hash you’ll generate in the next step covers the entire archive. If anyone modifies individual files inside, the archive hash changes. This gives you a single integrity check that covers all collected evidence.
The -r flag handles potential subdirectories (though History files are typically flat). The wildcard /tmp/*_History includes all copied files regardless of their specific profile names. Quotes around the zip filename handle cases where the case number or timestamp somehow contains spaces.
How to add it:
- Create a new action with type
tools.falcon.call_commandand add the below config. - Set dependency on
validate_files_ready_for_zip
operation_id: BatchAdminCmd
params:
  body:
    base_command: zip
    command_string: zip -r "${{ ACTIONS.generate_utc_timestamp.result.zip_filename }}" /tmp/*_History
    batch_id: ${{ ACTIONS.extract_session_information.result.batch_id }}
    session_id: ${{ ACTIONS.extract_session_information.result.session_id }}
- Add
run ifcondition:
${{ ACTIONS.validate_files_ready_for_zip.result.success == True }}
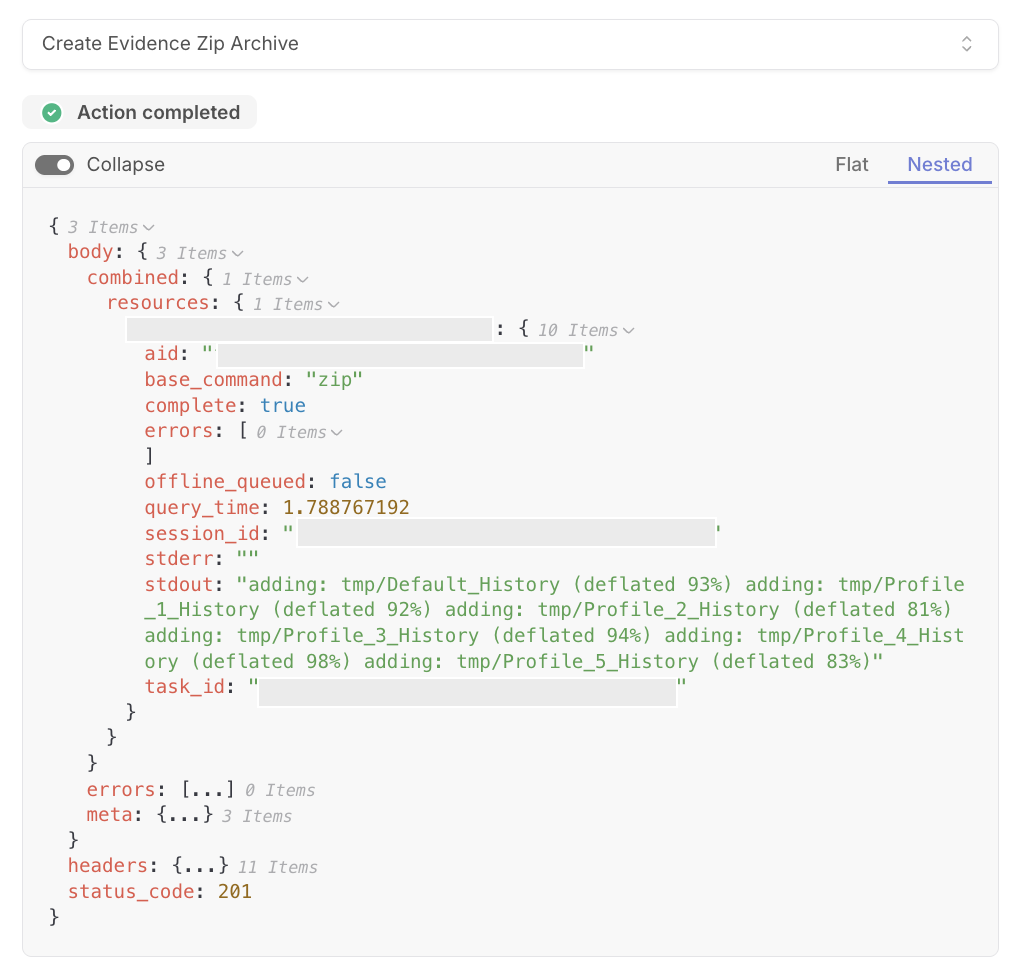
What you’ll see: If the action is successful, you will the what files were added to the /tmp directory in the stdout field.
Action 12: Zip Validation - validate_zip_created
What it does:
Examines the RTR response from the zip command to confirm the archive was created successfully. Checks for completion status, looks for error messages in stderr, and verifies that stdout contains "adding:" or "updating:" lines indicating files were actually archived.
Why it matters:
The zip command can fail silently, perhaps /tmp was full or the zip utility crashed. Checking RTR’s response catches these failures before you try to hash or upload a non-existent file.
Counting "adding:" lines provides quantitative validation. If you expected 3 History files but only see 2 "adding:" messages, something went wrong during the zip operation. This catches partial archive creation, which is worse than complete failure because it’s less obvious.
The stderr check looks for multiple failure patterns because different zip implementations phrase errors differently. The stdout validation looks for both "adding:" (new files) and "updating:" (files that existed in the archive) to handle edge cases where the zip file somehow already existed.
How to add it:
- Create a new action with type
core.script.run_pythonand add the below config. - Set dependency on
create_evidence_zip_archive
inputs:
  zip_result: ${{ ACTIONS.create_evidence_zip_archive.result }}
  device_id: ${{ ACTIONS.extract_session_information.result.device_id }}
  zip_filename: ${{ ACTIONS.generate_utc_timestamp.result.zip_filename }}
script: |
  def main(zip_result, device_id, zip_filename):
      # Navigate to device results
      resources = zip_result.get("body", {}).get("combined", {}).get("resources", {})

      if not resources or device_id not in resources:
          return {
              "success": False,
              "error": "No zip result found"
          }

      device_result = resources[device_id]
      stdout = device_result.get("stdout", "")
      stderr = device_result.get("stderr", "")
      complete = device_result.get("complete", False)

      # Check if zip command finished
      if not complete:
          return {
              "success": False,
              "error": "Zip command did not complete"
          }

      # Check stderr for common failure patterns
      # Different zip implementations phrase errors differently
      if stderr and ("error" in stderr.lower() or "not found" in stderr.lower() or "no matches" in stderr.lower()):
          return {
              "success": False,
              "error": f"Zip creation failed: {stderr}"
          }

      # Verify zip actually added files by checking stdout
      # zip outputs "adding: filename" for each file
      if "adding:" not in stdout.lower() and "updating:" not in stdout.lower():
          return {
              "success": False,
              "error": f"Zip did not add any files. stdout: {stdout}, stderr: {stderr}"
          }

      # Count how many files were archived
      # This provides quantitative validation
      added_files = [line for line in stdout.split('\n') if 'adding:' in line.lower() or 'updating:' in line.lower()]

      return {
          "success": True,
          "zip_filename": zip_filename,
          "files_added": len(added_files),
          "message": f"Zip created successfully with {len(added_files)} files"
      }
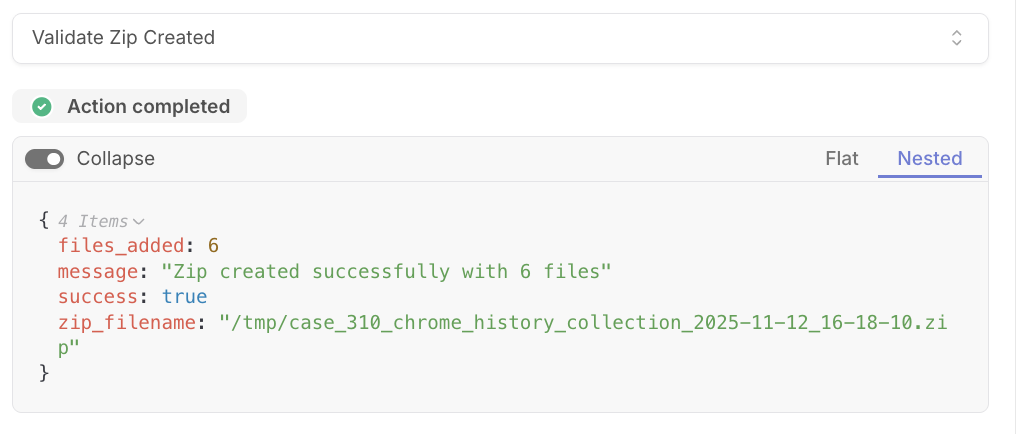
What you’ll see: If the action is successful, you will true response in the success field along with the name of the zip file created.
Action 13: Final Integrity Hash - hash_the_evidence_zip_file
What it does:
Generates MD5, SHA1, and SHA256 hashes of the completed zip archive using RTR’s filehash command. This creates the final integrity fingerprint for the entire evidence package.
Why it matters:
This hash is your proof that the evidence package hasn’t been tampered with. When you download the zip from CrowdStrike’s cloud storage, you’ll verify it against this hash. If they match, you know the file you’re analyzing is exactly what was collected from the endpoint.
The command is identical to the original file hashing, but now it’s targeting the zip archive. The output will include all three hash types plus the filename, which you’ll parse in the next action if you need structured hash data.
How to add it:
- Create a new action with type
tools.falcon.call_commandand add the below config. - Set dependency on
validate_zip_created
operation_id: BatchAdminCmd
params:
  body:
    base_command: filehash
    command_string: filehash "${{ ACTIONS.generate_utc_timestamp.result.zip_filename }}"
    batch_id: ${{ ACTIONS.extract_session_information.result.batch_id }}
    session_id: ${{ ACTIONS.extract_session_information.result.session_id }}
- Add
run ifcondition:
${{ ACTIONS.validate_zip_created.result.success == True }}
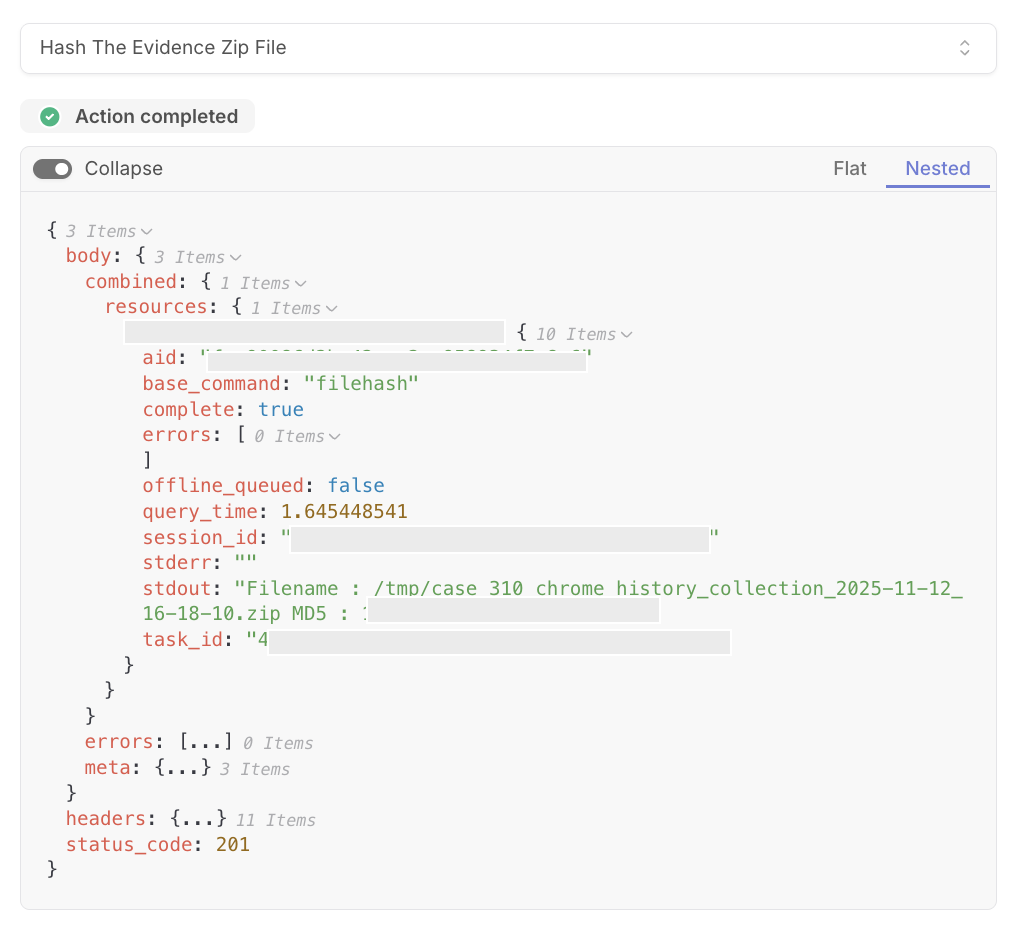
What you’ll see: If the action is successful, the stdout field will contain the hash of the zip file within the /tmp directory.
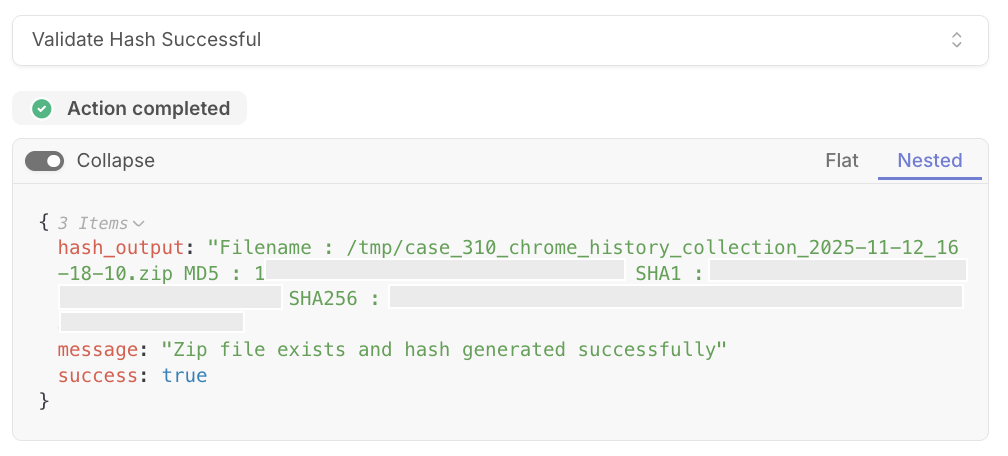
Action 14: Hash Validation - validate_hash_successful
What it does:
Verifies that the archive hashing command completed successfully by checking RTR’s response for completion status, error messages, and the presence of hash values in stdout. Confirms that MD5, SHA1, and SHA256 hashes were all generated.
Why it matters:
Without this validation, you might upload an archive to CrowdStrike’s cloud but have no way to verify its integrity later. If hashing failed, you need to know immediately so you can regenerate the archive before upload. This check ensures the hash output is actually usable by verifying the output contains valid hash strings. The script returns the raw hash_output so you can parse it later or include it in case comments for reference.
How to add it:
- Create a new action with type
core.script.run_pythonand add the below config. - Set dependency on
hash_the_evidence_zip_file
inputs:
  hash_result: ${{ ACTIONS.hash_the_evidence_zip_file.result }}
  device_id: ${{ ACTIONS.extract_session_information.result.device_id }}
script: |
  def main(hash_result, device_id):
      # Navigate RTR response
      resources = hash_result.get("body", {}).get("combined", {}).get("resources", {})

      if not resources or device_id not in resources:
          return {
              "success": False,
              "error": "No hash result found"
          }

      device_result = resources[device_id]
      stdout = device_result.get("stdout", "")
      stderr = device_result.get("stderr", "")
      complete = device_result.get("complete", False)

      # Verify hash command completed
      if not complete:
          return {
              "success": False,
              "error": "Hash command did not complete"
          }

      # Check for file not found errors
      # This would indicate the zip file doesn't actually exist
      if stderr and ("not found" in stderr.lower() or "couldn't find" in stderr.lower()):
          return {
              "success": False,
              "error": f"File not found for hashing: {stderr}"
          }

      # Verify hash output contains required algorithms
      # Need at least MD5 and SHA256 for most forensic workflows
      if not stdout or "MD5" not in stdout or "SHA256" not in stdout:
          return {
              "success": False,
              "error": f"No valid hash output. stdout: {stdout}, stderr: {stderr}"
          }

      return {
          "success": True,
          "message": "Zip file exists and hash generated successfully",
          "hash_output": stdout  # Return for case comment inclusion
      }
What you’ll see: If the action is successful, you will the hash output along with a success message.
Action 15: Upload to RTR Cloud - retrieve_evidence_zip
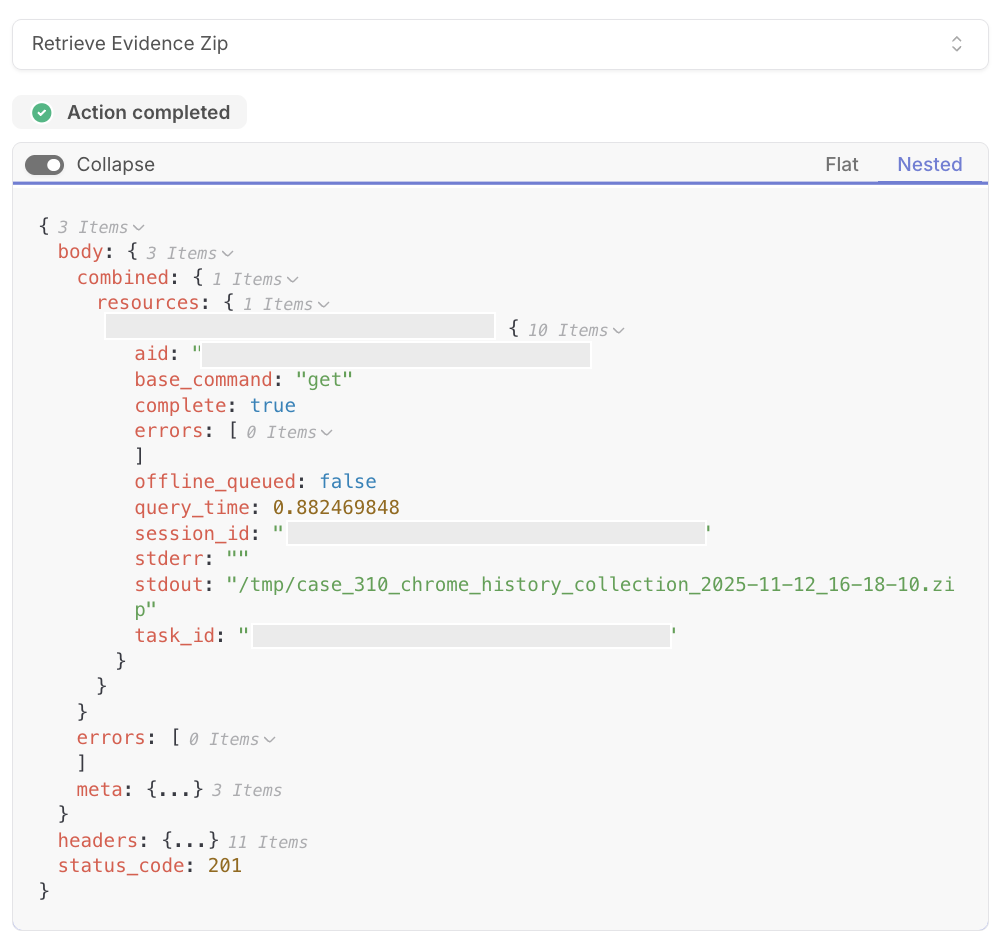
What it does:
Uses RTR’s get command to upload the evidence archive from the endpoint’s /tmp/ directory to CrowdStrike’s cloud storage. This makes the evidence accessible through the Falcon console without needing to maintain the RTR session.
Why it matters:
Once the file is in CrowdStrike’s cloud, it’s safe even if the endpoint reboots, the user deletes it, or the machine is reimaged. The get command effectively extracts evidence from the endpoint and places it in RTR cloud storage where it can be downloaded by your team for detailed analysis.
This is also the authorization point for evidence handling. CrowdStrike’s RTR cloud storage has access controls and audit logging. When you download the evidence later, that download is logged with your username and timestamp. This creates an unbroken chain of custody from collection to analysis.
How to add it:
- Create a new action with type
tools.falcon.call_commandand add the below config. - Set dependency on
validate_hash_successful
operation_id: BatchAdminCmd
params:
  body:
    base_command: get
    command_string: get "${{ ACTIONS.generate_utc_timestamp.result.zip_filename }}"
    batch_id: ${{ ACTIONS.extract_session_information.result.batch_id }}
    session_id: ${{ ACTIONS.extract_session_information.result.session_id }}
- Add
run ifcondition:
${{ ACTIONS.validate_hash_successful.result.success == True }}
What you’ll see: If the action is successful, you will a true value in the complete field along with the zip name in the stdout field as well.
Action 16: Retrieval Confirmation - validate_retrieval_successful
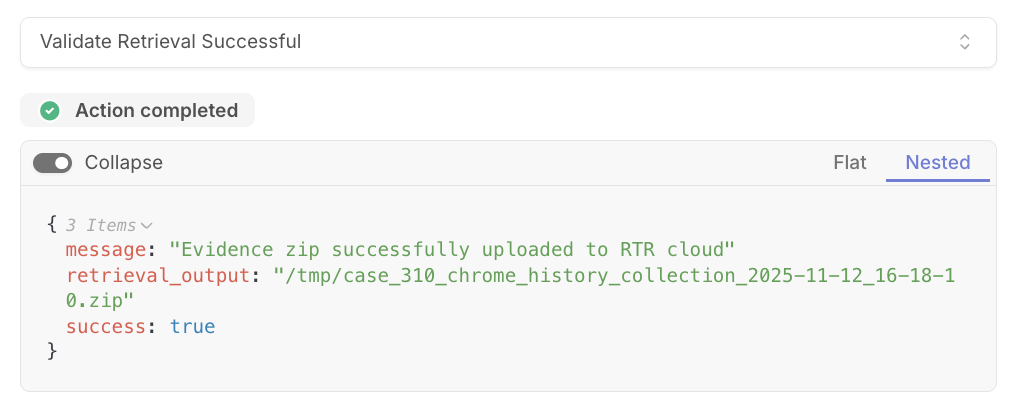
What it does:
Verifies that the evidence archive upload completed successfully by examining RTR’s response for completion status, error messages, and confirmation output. Ensures the file was successsfully transferred to RTR’s cloud storage.
Why it matters:
The get command can fail for several reasons, if the upload failed but you don’t catch it, you’ll delete the local copy during cleanup and lose your evidence.
This validation is your final confirmation that evidence is safely extracted from the endpoint. Once this passes, you know the zip file exists in two places: on the endpoint and in the cloud. Only after this confirmation you should proceed to cleanup.
The script checks for empty stdout as a failure condition because successful RTR uploads typically return file information. If stdout is empty, either the command didn’t run or the output was lost.
How to add it:
- Create a new action with type
core.script.run_pythonand add the below config. - Set dependency on
retrieve_evidence_zip
inputs:
  retrieval_result: ${{ ACTIONS.retrieve_evidence_zip.result }}
  device_id: ${{ ACTIONS.extract_session_information.result.device_id }}
script: |
  def main(retrieval_result, device_id):
      # Navigate RTR response
      resources = retrieval_result.get("body", {}).get("combined", {}).get("resources", {})

      if not resources or device_id not in resources:
          return {
              "success": False,
              "error": "No retrieval result found"
          }

      device_result = resources[device_id]
      stdout = device_result.get("stdout", "")
      stderr = device_result.get("stderr", "")
      complete = device_result.get("complete", False)

      # Verify get command completed
      if not complete:
          return {
              "success": False,
              "error": "Retrieval command did not complete"
          }

      # Check for file not found errors
      # This means zip doesn't exist or path was wrong
      if stderr and ("couldn't find" in stderr.lower() or "not found" in stderr.lower()):
          return {
              "success": False,
              "error": f"File not found for retrieval: {stderr}"
          }

      # Verify we got confirmation output
      # Successful RTR uploads typically return file information
      if not stdout or stdout.strip() == "":
          return {
              "success": False,
              "error": f"No retrieval confirmation. stderr: {stderr}"
          }

      return {
          "success": True,
          "message": "Evidence zip successfully uploaded to RTR cloud",
          "retrieval_output": stdout  # Keep for audit trail
      }
What you’ll see: If the action is successful, you will see a success message and the name of the file uploaded to RTR cloud.
Action 17: Documentation - case_comment_evidence_archive_completed
What it does:
Creates a case comment documenting the completion of evidence packaging: archive creation, integrity verification, RTR cloud upload, and preservation of original files.
Why it matters:
This case comment is your evidence receipt. It documents that at this specific time, evidence was properly archived, integrity-verified, and uploaded to secure storage.
The RTR audit log link provides independent verification. Anyone reviewing the case can click through to CrowdStrike and see the exact commands executed, when they ran, and their output.
How to add it:
- Create a new action with type
core.cases.create_comment - Set dependency on
validate_retrieval_successful - Configure the following fields:
case_id: ${{ACTIONS.create_case.result.id}}
content: |-
  Evidence Packaging Complete - Chrome history artifacts successfully archived and integrity-verified.
  Archive hash generated for chain of custody. Evidence package retrieved via RTR and available for analysis.
  Original files preserved on endpoint.
  Link to evidence in Falcon: https://XX.crowdstrike.com/real-time-response/sessions/audit-logs
What you’ll see: If the action is successful, you will see a new comment added to the case.

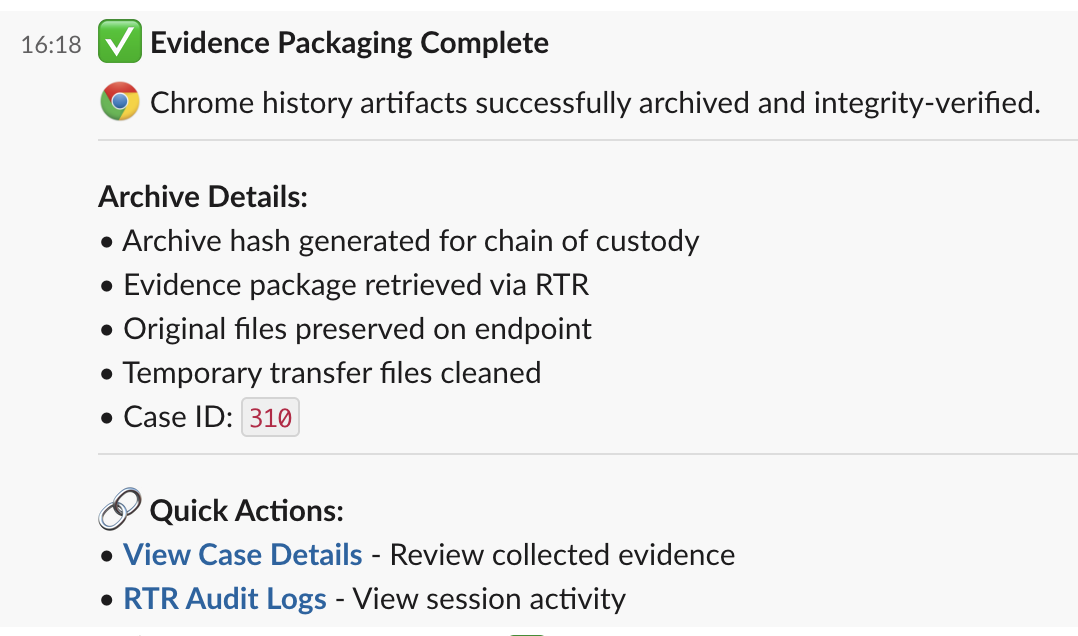
Action 18: Slack Update - post_message_evidence_archive_complete
What it does:
Sends a Slack notification announcing successful evidence packaging. Includes details about archive integrity verification, RTR upload, and preservation of original files. Provides quick links to case details and RTR audit logs.
Why it matters:
This notification tells your team that the evidence is safely extracted and ready for analysis.
How to add it:
- Create a new action with type
tools.slack.post_message - Set dependency on
case_comment_evidence_archive_completed - Update channel with your Slack channel ID
- Customize the URLs to match your instances
- Configure the following fields:
channel: XXXXXXX  # Replace with your channel ID
blocks:
  - type: section
    text:
      type: mrkdwn
      text: |-
        ✅ *Evidence Packaging Complete*

        :chrome: Chrome history artifacts successfully archived and integrity-verified.
  - type: divider
  - type: section
    text:
      type: mrkdwn
      text: |-
        *Archive Details:*
        • Archive hash generated for chain of custody
        • Evidence package retrieved via RTR
        • Original files preserved on endpoint
        • Temporary transfer files cleaned
        • Case ID: `${{ACTIONS.create_case.result.case_number}}`
  - type: divider
  - type: section
    text:
      type: mrkdwn
      text: |-
        *🔗 Quick Actions:*
        • <https://X.tracecat.com/workspaces/[workspace-id]/cases|*View Case Details*> - Review collected evidence
        • <https://X.crowdstrike.com/real-time-response/sessions/audit-logs|*RTR Audit Logs*> - View session activity
What you’ll see: If the action is successful, you will see a slack message posted in the channel you’ve setup.
Conclusion
That’s it for part 2
In 18 actions, we’ve built a collection engine that:
- ✅ Generates and validates integrity hashes for all original files
- ✅ Copies Chrome history files with multi-checkpoint validation
- ✅ Creates timestamped, compressed evidence archives
- ✅ Uploads evidence to RTR cloud with integrity verification
- ✅ Documents every step in case management and Slack
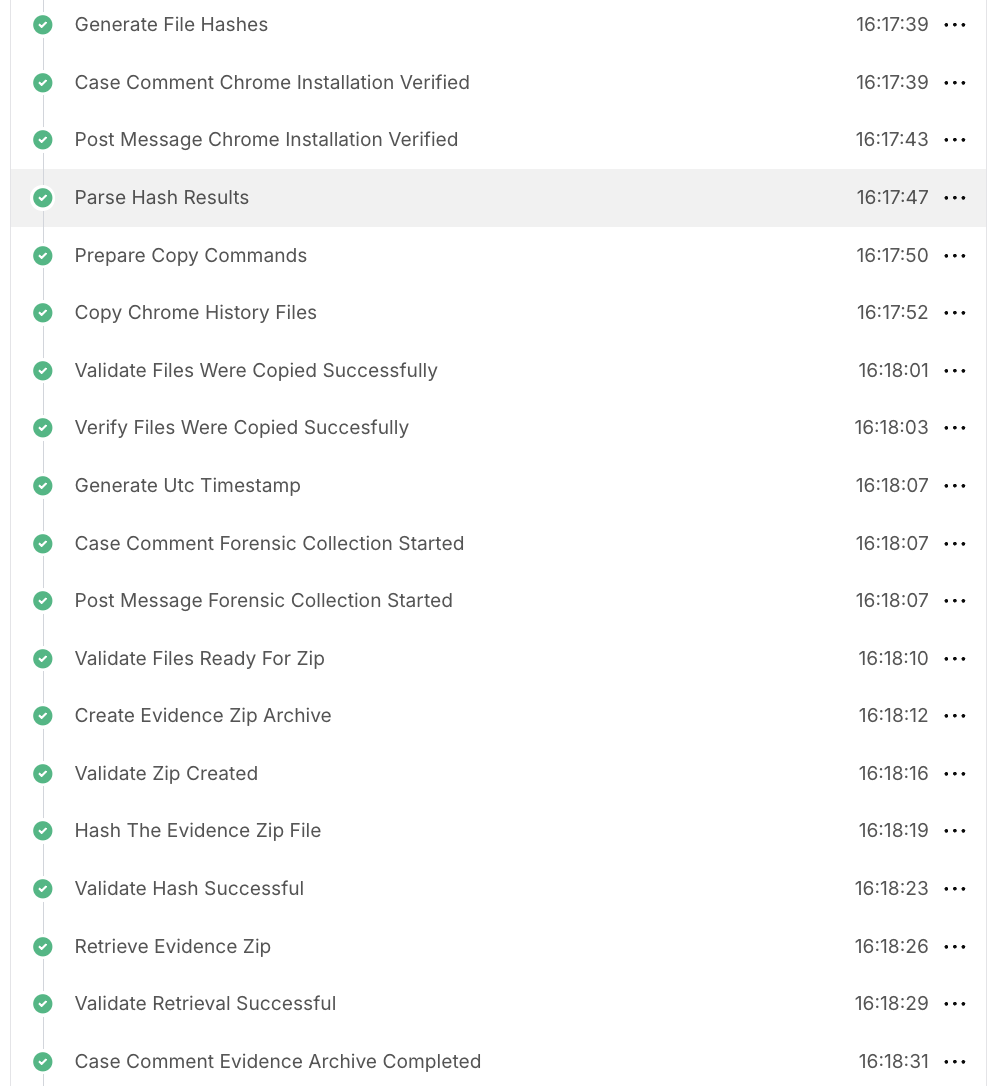
macOS /tmp directory
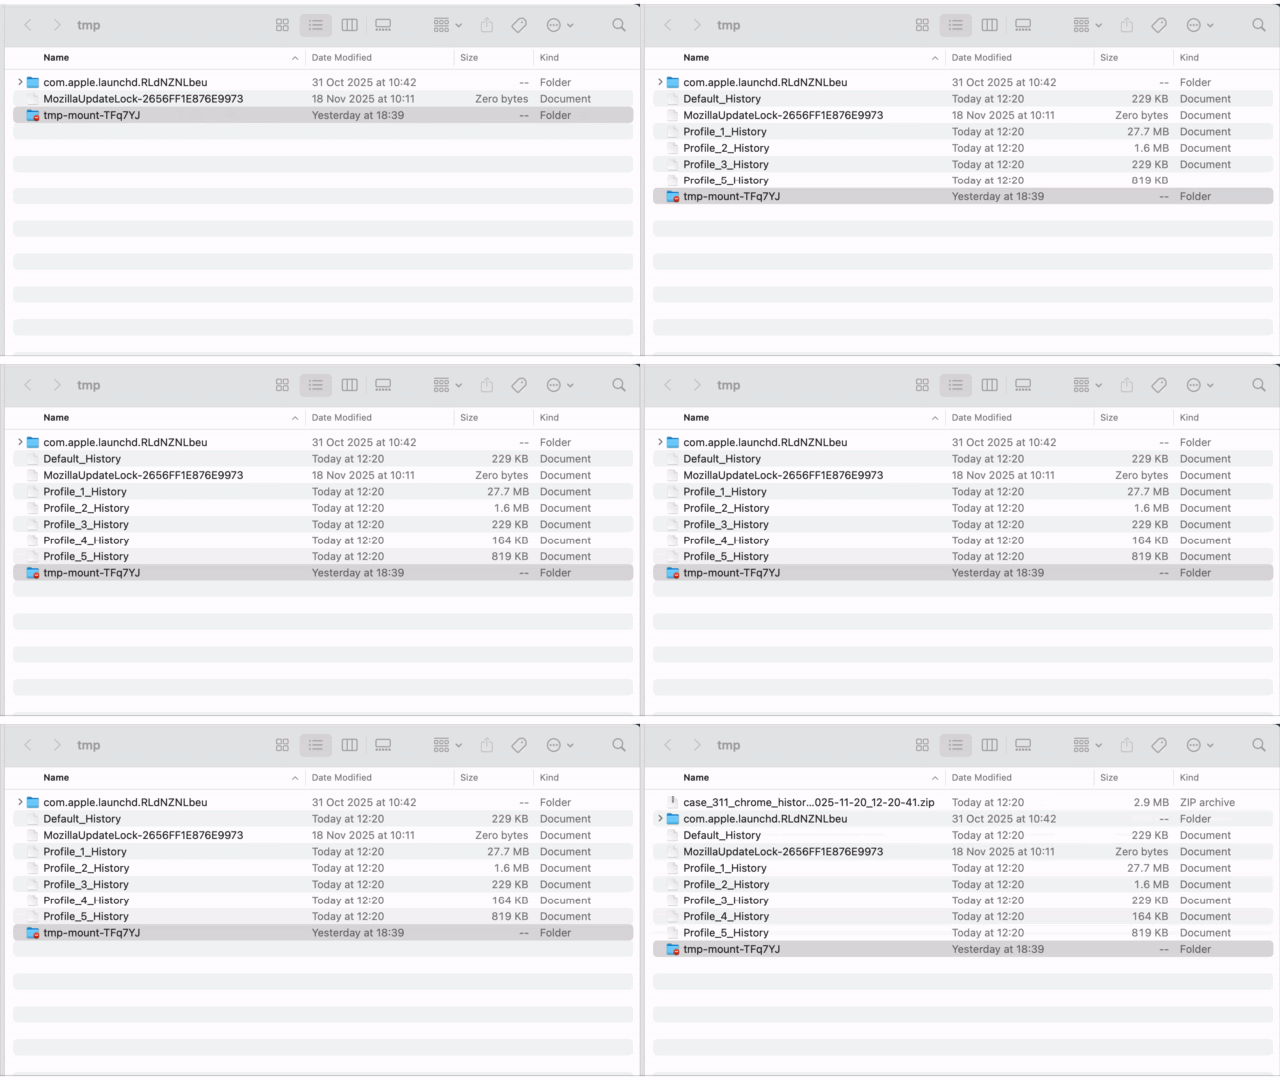
CrowdStrike RTR Logs
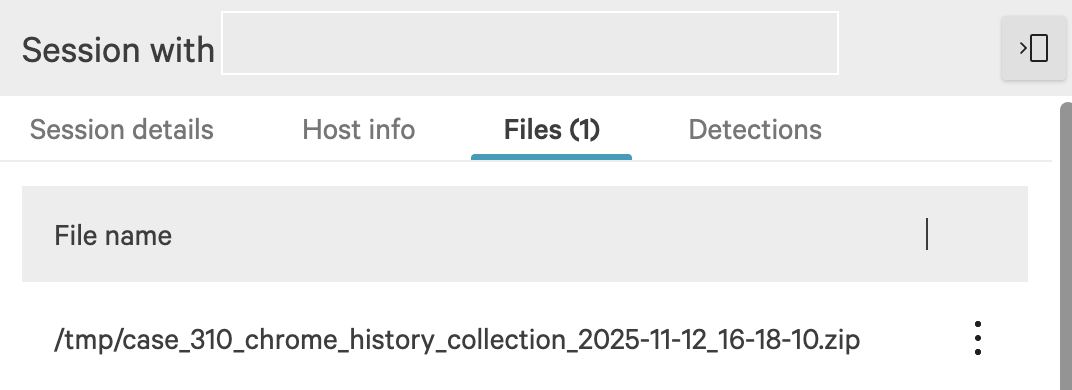
Challenge For You: Build Part 2 and upload your zip files to CrowdStrike RTR cloud.
In this workflow, we’ve introduced another Tracecat feature For Loops to help with evidence collection, verification of hashes at multiple checkpoints, and uploaded all files to RTR cloud. The final part completes the workflow, we’ll be cleaning up temporary files without destroying evidence and end the RTR session gracefully.
If you have any questions or if you’re stuck, drop me a DM or send me an email. I’m also in the official Tracecat Discord.
Next in the series: Part 3 - Production Polish (Cleanup, Notifications & Error Handling) [December 2025]